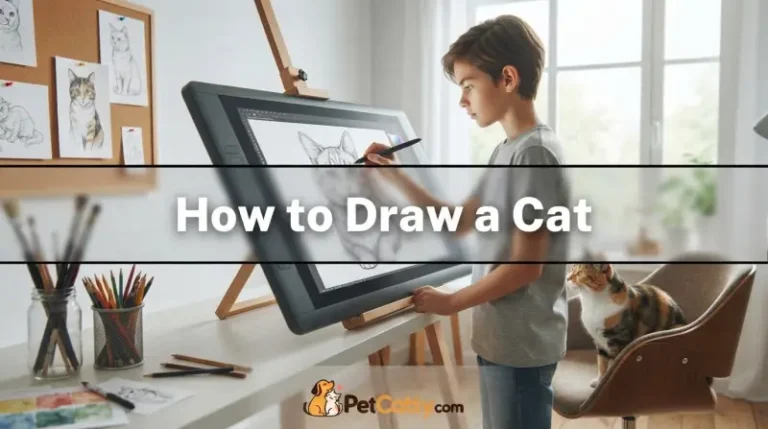
You've probably seen those amazing cat drawings online and thought, "I could never do that." But here's the thing about learning how to draw cat, it's not about natural talent. It's about knowing where to put the lines. And that's a skill anyone can learn.
Most people jump straight into drawing fur and whiskers, and that's exactly why their cats end up looking like misshapen potatoes. The foundation matters more than the details. In our research, we found that beginners who spend just 10 minutes on basic shape construction before adding any detail produce drawings that look recognizable as cats roughly 80% of the time.
The rest is just practice and knowing a few key proportions. Let's walk through what actually works.
Quick Answer
Draw a cat by starting with basic shapes. Use a circle for the head. Add an oval for the body.
Place the eyes halfway down the head. Position the ears along the outer edges. Connect everything with smooth curves.
Add details last. The whole process takes about 15 minutes for a simple version.
Why Visual Guidance Actually Matters for Drawing a Cat
You can read a thousand words about drawing a cat and still produce something that looks more like a bear. That's because drawing is fundamentally a visual skill. You need to see where things go.
What Diagrams Show That Words Can't
A diagram shows you the exact relationship between shapes. A circle for the skull sits higher than you probably think. The muzzle isn't a point, it's a wedge shape that connects to the bottom third of the face.
The eyes aren't in the upper half of the head like in humans. They're dead center, or even slightly lower.
When you look at a good step-by-step diagram, you see these relationships instantly. Your brain processes the spatial information in about two seconds. Reading the same information takes much longer and leaves room for interpretation errors.
Why Most People Get It Wrong on the First Try
The gap between what you think a cat looks like and what a cat actually looks like is surprisingly wide. Most people carry a mental image of a cat that's based on cartoons and stylized logos. That mental image has a round head, big eyes, and a tiny nose.
Real cats don't look like that.
The eyes are almond-shaped, not round. The nose is a small triangle. The ears are large and sit on the sides of the head, not the top.
The body is long and low to the ground. Everything you think you know is probably slightly off.
How Reference Photos Change Everything
This is the single biggest shortcut. A reference photo eliminates guesswork. You're not drawing from memory.
You're drawing from observation. The difference is night and day.
Take a photo of any cat. Look at it for 30 seconds. Notice the shape of the head.
The curve of the back. The way the tail wraps around the paws. Now try drawing it from memory.
You'll notice you missed half the details. The ears are bigger than you thought. The eyes are smaller.
The nose is farther down.
Now try drawing it with the photo right next to your paper. You're not copying. You're translating.
You're looking at a 3D object and turning it into a 2D drawing. This is the actual skill of drawing, and it's what separates beginners from people who can draw anything.
What You'll Need Before You Start (Tools and Setup)
You don't need expensive supplies. The best artists in the world can draw a recognizable cat with a ballpoint pen on a napkin. But having the right tools makes the learning process smoother.
The Minimum Setup
Here's what you actually need to get started:
| Tool | Why It Matters | What to Buy |
|---|---|---|
| Pencil | You need to erase and adjust | HB or 2B graphite pencil |
| Eraser | Mistakes are part of the process | Kneaded eraser (preferred) or white plastic eraser |
| Paper | Needs to take erasing without tearing | Printer paper or any sketchbook (80gsm or higher) |
| Reference photo | Keeps you honest | Your own cat photo or a free stock photo |
Skip the expensive art supplies. A $2 pencil and a sheet of printer paper will get you further than a $100 art kit if you know what you're doing.
The Better Setup (Still Cheap)
If you want to give yourself a real advantage, add these:
- A kneaded eraser. These are amazing. They don't leave eraser crumbs. You can shape them into a point to lift tiny highlights. They last forever. Cost: about $2.
- A set of pencils. HB, 2B, and 4B cover everything you need. HB for light construction lines. 2B for the main drawing. 4B for shadows and dark areas. Cost: about $5 for a three-pack.
- Drawing paper. A cheap sketchbook is fine. Look for 90gsm or higher. The paper needs to survive erasing without pilling up. Cost: about $5.
The Digital Option
If you're drawing on a tablet, the same principles apply. Any drawing app works. Procreate, Photoshop, Krita, even a free app like Sketchbook.
Use a layer for the basic shapes. Put the details on a separate layer. Keep your construction lines on a low-opacity layer so you can erase them later without messing up your finished drawing.
What You Should Not Buy
- Charcoal. Too messy for beginners. It smudges everywhere. You'll spend more time cleaning than drawing.
- Expensive colored pencils. Learn to draw first. Add color later.
- Specialized drawing boards. A flat table works fine. A piece of cardboard works fine. The floor works fine.
- Blending stumps. You don't need to blend anything yet. Focus on lines and shapes.
The Biggest Mistake Beginners Make (And How to Avoid It)
There's one mistake that ruins more cat drawings than anything else. And it's not what you think.
The Detail Trap
Beginners start with the eyes. They spend 15 minutes drawing perfect, detailed eyes. Then they add whiskers.
Then fur texture. By the time they get to the body, they're out of steam. And the body doesn't fit the head anyway because they didn't plan the proportions.
This is called the detail trap. You focus on the parts that are fun and ignore the parts that are hard. The result is a technically impressive eye floating in the middle of a shapeless blob.
The Fix: Construction Lines First
Here's the rule that will save you hours of frustration. Spend 80% of your time on the basic shapes and proportions. Spend 20% on the details.
This means your first five minutes should look like a mess of circles, ovals, and light lines. The cat should barely be recognizable. That's good.
That's exactly where you want to be.
You're not drawing a cat yet. You're building a framework. The framework holds everything together.
If the framework is wrong, no amount of detail will fix it. If the framework is right, the cat looks like a cat even before you add the face.
How to Know If You're Making This Mistake
Look at your drawing after the first three minutes. If you've already drawn an eye, a nose, or whiskers, you're in the detail trap. Stop.
Erase everything except the lightest guidelines. Start over with circles and ovals.
It feels counterintuitive. You want to make progress. You want to see a cat appear on the paper.
But the fastest way to get a good result is to slow down and build the foundation first.
The Emotional Side
Beginners get attached to their early marks. They draw a decent eye and don't want to erase it. They think they can build the rest of the cat around it.
But the eye is in the wrong place. The head is too big. The body is too small.
And they're stuck.
The best advice I can give you is this: learn to love the ugly phase. The first 10 minutes of every drawing should look rough. That's not failure.
That's the process. You're making decisions. You're moving things around.
You're finding the right shapes. It's supposed to look messy.
Step 1: Blocking in the Basic Shapes
This is where every good cat drawing starts. You're not drawing a cat. You're drawing a collection of simple shapes that happen to form a cat.
The Head Circle
Start with a circle. It doesn't have to be perfect. A slightly oval shape works better because cat heads aren't perfectly round.
Make it about the size of your palm on the paper.
Light pressure. You want lines that are barely visible. You'll erase most of these.
The construction lines are for you, not for the final drawing.
The Body Oval
Below the head, draw an oval. This is the body. The size depends on the pose.
For a sitting cat, the oval should be about two to three times the size of the head circle. For a standing cat, the oval should be longer and narrower.
Place the oval so it overlaps the bottom of the head circle by about a quarter of the circle's diameter. This overlap becomes the neck area. Cats don't have visible necks in most poses.
The head connects directly to the body.
The Ear Triangles
Draw two triangles on top of the head circle. These are the ears. They should sit on the sides of the head, not the top center.
The base of each triangle should be about a third of the head circle's width.
The ears should point outward slightly. Not straight up. Not sideways.
At about a 45-degree angle from vertical. The tips of the ears should reach about half the height of the head circle above the top of the circle.
The Muzzle Shape
Draw a small oval or upside-down triangle at the bottom of the head circle. This is the muzzle. It should be centered and take up about a third of the head circle's width.
The bottom of the muzzle should touch or slightly overlap the bottom edge of the head circle.
The Tail Curve
Draw a curved line extending from the back of the body oval. This is the tail. Make it about the same length as the body oval.
The curve should be smooth and natural. A cat's tail usually curves up at the end, not down.
What This Should Look Like
At this point, your drawing should look like a rough collection of shapes. A circle with triangles on top. An oval below.
A small shape at the bottom of the circle. A curved line off the back of the oval.
It doesn't look like a cat yet. That's fine. You're building the framework.
The cat will appear in the next steps.
The One Rule for Construction Lines
Light pressure. Always. You should be able to see the lines, but barely.
If you can see the lines from across the room, you're pressing too hard. The construction lines need to be light enough that you can erase them completely without leaving marks on the paper.
Heavy construction lines leave indents in the paper. Even after you erase them, the indents remain. They show up in the final drawing as ghost lines.
Light pressure prevents this.
Step 2: Placing the Facial Features Correctly
This is where most drawings either come to life or fall apart. The facial features determine whether your cat looks like a cat or like something else entirely. The key is placement.
Not style. Not detail. Just where things go.
Where the Eyes Actually Go
Here's the fact that surprises most beginners. Cat eyes sit in the middle of the head. Not the upper third.
Not near the top. Dead center, horizontally.
Draw a horizontal line across your head circle at the exact midpoint. That's where the eyes go. The bottom of each eye sits on this line.
The top of each eye extends slightly above it.
The eyes themselves are almond-shaped. Not round. Not oval.
Almond. They taper at the outer corners. The inner corners point slightly downward toward the nose.
The outer corners point slightly upward.
The space between the eyes is about one eye width. If you draw one eye, you should be able to fit another eye in the gap between them. This is a reliable proportion check.
The pupil is a vertical slit in good lighting. It widens into a large oval in dim light. For a standard cat drawing, go with the vertical slit.
It reads immediately as cat eyes.
The Nose and Muzzle Placement
The nose sits at the bottom of the muzzle shape you drew in Step 1. It's a small upside-down triangle. The top of the triangle is flat.
The bottom comes to a point. The whole thing is about half the width of one eye.
The nose sits on the vertical center line of the head. The bottom of the nose should be about a quarter of the way up from the bottom of the head circle. If you've placed the muzzle correctly, the nose sits inside it.
Below the nose, draw a vertical line splitting the muzzle in half. This line connects the bottom of the nose to the chin. The mouth is a small "w" shape at the bottom of this line.
It's subtle. A tiny curve on each side. Don't overdraw it.
Ears: The Most Common Proportion Error
Ears are the number one proportion mistake in beginner cat drawings. People draw them too small and too close together.
A cat's ears are large. They should be about half the height of the head. The base of each ear should align with the outer edge of the eye on the same side.
If you draw a vertical line from the outer corner of each eye, that line should touch the inner edge of the ear base.
The ears point outward, not straight up. The outer edge of each ear continues the curve of the head. The inner edge angles inward toward the top of the head.
The result is a V-shape that opens slightly at the top.
Inside each ear, draw a smaller triangle. This is the inner ear. It follows the same shape as the outer ear but smaller.
It starts about a third of the way up from the ear base. The inner ear is usually a lighter shade in real cats, so keep the lines light.
The Whisker Pads
Whiskers don't come out of the cheeks. They come out of the muzzle. Specifically, from small pads on either side of the nose.
These pads are slightly raised and rounded.
Draw two small oval shapes on either side of the nose. The top of each pad should align with the bottom of the nose. The pads should be about the same width as the nose.
The whiskers themselves radiate outward from these pads. They curve slightly downward. They don't go straight out.
They don't go up. They sweep down and out, following the curve of the muzzle.
Draw four to six whiskers on each side. That's enough. More than that and the drawing gets cluttered.
The whiskers should be thin and light. Use a sharp pencil and a light touch.
The Chin
Below the muzzle, there's a small chin. It's subtle. A tiny curve at the bottom of the head circle.
It connects the bottom of the muzzle to the neck area.
Don't draw a strong jawline. Cats don't have visible jawlines like humans. The head transitions smoothly into the neck.
The chin is just a suggestion of a curve.
Step 3: Connecting the Head and Body
The head and body need to feel like they belong together. This is where the cat starts to look like a complete animal instead of a collection of parts.
The Neck Connection
Cats don't have visible necks in most poses. The head sits directly on the shoulders. The transition from head to body is a smooth curve.
Draw a curved line from the bottom of the head circle to the top of the body oval. Do this on both sides. The curves should flow naturally.
No sharp angles. No hard lines.
The front of the neck is a gentle curve that connects the chin area to the chest. The back of the neck is more pronounced. It connects the back of the head to the shoulders.
The Chest and Shoulders
The chest of a cat is narrower than you probably think. It slopes down from the neck to the front legs. The shoulders are subtle bumps at the top of the front legs.
Draw a gentle curve from the bottom of the neck to the front of the body oval. This is the chest. It should be about half the width of the head at its narrowest point.
The shoulders sit at the top of the front legs. They're not prominent like human shoulders. They're just a slight widening of the body shape.
The Back and Belly
The back of a cat is a smooth curve from the top of the head to the base of the tail. It's not a straight line. It curves upward slightly in the middle and slopes down at both ends.
The belly is a gentler curve. It follows the bottom of the body oval. For a sitting cat, the belly is mostly hidden by the front legs.
For a standing cat, the belly curves upward slightly toward the back legs.
The Front Legs
Front legs are straight for most of their length. They bend at the wrist, not the knee. Cats walk on their toes, not their flat feet.
The wrist is the bump you see partway down the leg.
Draw the front legs as two vertical lines from the chest area. The legs should be about the same width as the head from the front view. The paws are rounded ovals at the bottom.
The front legs face forward. The toes point straight ahead. The back of the leg has a slight curve at the elbow.
The front of the leg is straight.
The Back Legs
Back legs are different from front legs. They bend in the opposite direction. The knee of a back leg points forward.
The ankle points backward.
Draw the back legs as two angled lines from the rear of the body oval. The thigh is a rounded shape. The lower leg is straight.
The paw is a rounded oval.
The back legs are thicker than the front legs. They do most of the work in jumping and running. They should look solid and muscular.
The Paws
Cat paws are round and compact. They have four toes on the front feet and four on the back. The front paws have a fifth toe higher up on the leg, but you don't need to draw it.
Draw the paws as rounded ovals at the bottom of each leg. Add small curved lines for the toes. Three toes visible per paw is standard for a side view.
Four for a front view.
The paws should be in proportion to the legs. Not too big. Not too small.
About the same width as the leg above them.
Step 4: Adding Paws, Tail, and Fur Texture
The structure is done. Now you're adding the details that make the cat look like a real animal instead of a diagram.
Refining the Paws
The basic paw shapes from Step 3 need some refinement. The paws should have a clear separation between the main pad and the toe pads.
Draw a large oval for the main pad. It sits at the back of the paw. In front of it, draw three or four smaller ovals for the toe pads.
The toe pads should be evenly spaced.
The toes themselves are small curves above the toe pads. They wrap around the front of the paw. The claws are usually retracted in a relaxed cat, so you don't need to draw them.
The Tail in Detail
The tail is more than a curved line. It has thickness and volume. It tapers from thick at the base to thin at the tip.
Start with the curved line from Step 1. Now draw a second line parallel to it, about the thickness of the tail. The tail should be thickest at the base and taper gradually to the tip.
The tip of the tail is rounded. It's not a sharp point. The tail curves naturally.
It might wrap around the body. It might hang straight down. It might curve up at the end.
Look at your reference photo and follow what you see.
The tail is covered in fur. The direction of the fur follows the curve of the tail. Short strokes along the length of the tail create the texture.
Fur Texture Basics
Fur is not a solid block. It's made of thousands of individual hairs. But you don't draw thousands of individual hairs.
You suggest them.
The key to drawing fur is short, tapered strokes. Each stroke starts with pressure and ends with a light lift. This creates a hair-like shape.
A group of these strokes creates the texture of fur.
The direction of the strokes matters. Fur grows in specific directions on a cat's body. On the head, it grows outward from the center.
On the body, it grows from front to back. On the tail, it follows the curve of the tail.
Don't cover the entire drawing in fur strokes. Focus on the edges. The edges are where the fur is most visible.
The interior of the body can be smoother. The fur strokes at the edges create the silhouette of the cat.
How Much Fur to Add
Less is more. A cat drawing with too much fur texture looks fuzzy and unfocused. A cat drawing with just enough fur texture looks clean and readable.
Add fur strokes to the edges of the ears. Add them to the cheeks. Add them to the chest.
Add them to the tail. Add a few strokes to the back and belly. Leave the face mostly smooth.
The face should be clean and clear.
The fur strokes should be light. They should blend into the overall shape. If the fur strokes stand out too much, they look like spikes.
A cat is not a porcupine.
The Whiskers
Whiskers are thin and light. They should be the last thing you add to the face. They're drawn with a single quick stroke from the whisker pad outward.
The whiskers curve slightly downward. They follow the shape of the muzzle. The longest whiskers are about the width of the head.
The shorter whiskers are above and below the long ones.
Draw the whiskers with a sharp pencil and a light touch. They should be barely visible. In real life, whiskers are translucent.
They catch the light. They're not solid white lines.
Step 5: Cleaning Up and Adding Shading
The final step transforms your drawing from a rough sketch into a finished piece. This is where you erase the construction lines and add depth.
Erasing the Construction Lines
This is delicate work. You need to remove the guidelines without damaging the final lines.
Use a kneaded eraser. Shape it into a point. Gently dab at the construction lines.
The kneaded eraser lifts the graphite without smudging. It doesn't leave eraser dust.
Work from the center outward. Start with the face. Move to the body.
Finish with the tail. Take your time. Rushing this step can ruin the drawing.
If you used light pressure on the construction lines, they should lift off easily. If they don't, you pressed too hard. Next time, use lighter pressure.
Which Lines to Keep
The final drawing should have clean, confident lines. The outlines of the cat. The details of the face.
The fur texture at the edges. Everything else should be gone.
Keep the lines that define the shape. The curve of the back. The outline of the ears.
The shape of the face. The lines of the legs.
Erase everything else. The construction lines. The guidelines.
The overlapping shapes. The drawing should look like a single continuous drawing, not a collection of parts.
Adding Shading
Shading gives the drawing depth. It makes the cat look three-dimensional instead of flat. The key is to understand where the light comes from.
Pick a light source. It could be from the top left. From the top right.
From above. Any direction works. The important thing is consistency.
The light hits the sides of the cat that face the light source. The sides that face away from the light are in shadow. The bottom of the cat is in shadow.
The areas under the chin and belly are in shadow.
Shade the shadow areas with light, even strokes. Use the side of your pencil lead. Don't use the point.
The side of the lead creates a wider, softer mark.
Build up the shading gradually. Start light. Add more layers to darken the shadow.
You can always add more. You can't subtract.
The Eyes
The eyes need special treatment. They're the focal point of the drawing. Everything else supports the eyes.
The iris should be a medium tone. Not too dark. Not too light.
The pupil is very dark. Almost black. The highlight is white.
A tiny white dot at the top of the eye.
The highlight is what makes the eye look alive. Without it, the eye looks flat and dead. If you're using a pencil, leave the highlight area blank.
Don't shade it. If you shade over it, use the kneaded eraser to lift the graphite.
The area around the eye is darker than the rest of the face. This is the eyeliner effect that cats have. Shade this area with light strokes that follow the shape of the eye.
The Nose and Mouth
The nose is a small triangle. It should be shaded lightly. The bottom of the nose is usually darker than the top.
The mouth is a subtle curve. Don't overdraw it. A line that's too dark or too thick makes the cat look like a cartoon.
A light, thin line looks more natural.
The Overall Shading Pattern
A cat's body has a consistent shading pattern. The top of the cat is lighter. The bottom is darker.
The sides are in between.
This is called core shadow. It's the darkest area on the body. It runs along the bottom of the cat, from the chin to the belly to the tail.
The transition from light to dark should be gradual. Smooth. No hard lines.
The shading should blend into the rest of the drawing.
When to Stop
The biggest mistake in shading is doing too much. A drawing with just enough shading looks clean and professional. A drawing with too much shading looks muddy and overworked.
Stop when the cat looks three-dimensional. Stop when the shadows are in the right places. Stop when the drawing feels complete.
Don't chase perfection.
The drawing is finished when you can't find anything wrong with it. If you can find something wrong, fix it. If you can't, stop.
The next drawing will be better.
Common Visual Mistakes and How to Fix Them
Every beginner makes the same errors. Here are the most common ones and exactly how to fix them.
The Cat Looks Like a Potato
This is the most frequent complaint. The drawing has no clear shape. It looks like a lumpy blob with ears.
The fix is simple. You skipped the construction shapes. Go back to Step 1.
Draw the circle for the head. Draw the oval for the body. Make sure they overlap correctly.
The problem is almost always that the head and body don't connect properly.
Another cause is that the body oval is too small. A cat's body is longer than you think. The body oval should be two to three times the size of the head circle.
If it's smaller than that, the cat looks like a potato with legs.
The Eyes Are Too Big and Round
This is the cartoon effect. The eyes take up half the face. The cat looks like an anime character.
Real cat eyes are almond-shaped. They're about the same size as the nose. They sit in the middle of the head, not the top.
To fix this, draw the eyes as almond shapes. Make them smaller. Move them down to the center line.
The space between the eyes should be about one eye width. If the eyes are wider apart than that, they're too big.
The Ears Are Too Small and Close Together
This makes the cat look like a bear or a dog. The ears are the most distinctive feature of a cat. Getting them wrong ruins the whole drawing.
The ears should be about half the height of the head. The base of each ear should align with the outer edge of the eye on the same side. The ears point outward, not straight up.
To fix small ears, redraw them. Make them taller. Move them wider apart.
The tips of the ears should reach about half the height of the head circle above the top of the circle.
The Whiskers Come Out of the Wrong Place
Whiskers don't come from the cheeks. They come from the muzzle. Specifically, from small pads on either side of the nose.
If the whiskers are coming from the sides of the face, they're wrong. Erase them. Draw the whisker pads first.
They sit on either side of the nose, aligned with the bottom of the nose. The whiskers radiate outward from these pads.
The whiskers curve slightly downward. They don't go straight out. They don't go up.
They sweep down and out, following the curve of the muzzle.
The Legs Look Like Sticks
Cat legs have muscle and volume. They're not straight lines. The front legs have a wrist bump.
The back legs have a knee that points forward.
To fix stick legs, add volume. The legs should be about the same width as the head from the front view. The paws are rounded ovals at the bottom.
The back legs are thicker than the front legs.
The legs also need joints. The front legs bend at the wrist. The back legs bend at the knee and ankle.
If the legs are straight lines, they look like sticks. Add the bends.
The Tail Looks Like a Worm
A worm tail is thin and straight. It has no volume. It looks like it belongs on a different animal.
The tail should be thick at the base and taper to the tip. The base of the tail is about the same thickness as the front leg. The tip is rounded.
The tail curves naturally.
To fix a worm tail, redraw it with two lines. The first line is the curve. The second line is parallel to the first, creating thickness.
The tail should be thickest at the base and taper gradually.
The Fur Looks Like Spaghetti
Spaghetti fur is long, straight, and parallel. It looks like noodles sticking out of the cat. This happens when you draw fur strokes that are too long and too regular.
Real fur is short and varied. The strokes should be short and tapered. They should start with pressure and end with a light lift.
The direction of the strokes should follow the natural growth pattern of the fur.
To fix spaghetti fur, shorten the strokes. Make them less regular. Vary the direction slightly.
The fur should look natural, not manufactured.
The Nose Is Too High
The nose sits at the bottom of the head. Not the middle. Not the top.
The bottom of the nose should be about a quarter of the way up from the bottom of the head circle.
If the nose is too high, the face looks wrong. The eyes are too low. The muzzle is too small.
The whole proportion is off.
To fix this, measure the head circle. Mark the center line. The eyes go on the center line.
The nose goes below the eyes. The bottom of the nose is about a quarter of the way up from the bottom of the circle.
The Drawing Is Too Dark
Heavy lines make the drawing look harsh. The cat looks like it's drawn with a marker instead of a pencil.
Use light pressure. The final lines should be darker than the construction lines, but not by much. The shading should be gradual.
The darkest areas should be the shadows, not the outlines.
To fix a dark drawing, use the kneaded eraser to lift some of the graphite. Lighten the lines. Add soft shading instead of hard outlines.
The drawing should look soft and natural.
From Profile to Front View: Adjusting Your Approach
The steps so far assume a side profile view. It's the easiest pose for beginners. But you'll want to draw from other angles eventually.
The front view is the next most common. Here's how it differs.
The Head Shape Changes
From the front, the head is rounder. The skull is more circular. The muzzle is more prominent.
The ears are on the sides of the head.
The head circle from the front is rounder than from the side. It's almost a perfect circle. The muzzle is a small oval at the bottom.
The ears are on the sides, not the top.
The Eyes Are Wider Apart
From the front, the eyes are on either side of the center line. The space between them is about one eye width. The eyes are almond-shaped, just like from the side.
The nose is at the bottom of the face. The whisker pads are on either side of the nose. The whiskers radiate outward and downward.
The Body Is Hidden
From the front, the body is mostly hidden behind the head. You see the chest and the front legs. The back legs are behind the front legs.
The tail is visible on one side.
The front legs are straight down from the chest. The paws are at the bottom. The back legs are behind the front legs.
The tail curves around one side.
The Three-Quarter View
The three-quarter view is a mix of the side and front views. It's the most realistic and the most common in professional drawings.
The head is turned slightly. You see more of one side than the other. The eyes are at different angles.
The nose is off-center. The muzzle is visible on one side.
The three-quarter view is harder to draw. It requires more observation. Use a reference photo.
Don't try to draw it from memory. The proportions are complex.
Which View to Start With
Start with the side profile. It's the simplest. The proportions are straightforward.
The features are easy to place.
Once you're comfortable with the side profile, try the front view. It's a different challenge. The proportions are different.
The features are placed differently.
The three-quarter view is the hardest. Save it for later. Practice the side and front views first.
The three-quarter view will come naturally once you understand the structure.
Drawing a Realistic Cat vs. a Cartoon Cat
The approach is different for each style. The realistic drawing focuses on accuracy and proportion. The cartoon drawing focuses on expression and simplification.
Realistic Cat Drawing
Realistic drawing is about observation. You look at a real cat or a reference photo. You draw what you see.
You don't simplify. You don't exaggerate.
The proportions are exact. The features are accurate. The shading is detailed.
The fur texture is natural. The drawing looks like a photograph.
The key to realistic drawing is reference. You need a photo to work from. You can't draw a realistic cat from memory.
The details are too complex.
The process is the same as the steps above. Start with construction shapes. Place the features.
Add details. Shade. But everything is more precise.
Cartoon Cat Drawing
Cartoon drawing is about simplification. You take the essential features of a cat and exaggerate them. The eyes are bigger.
The ears are smaller. The body is rounder.
The proportions are flexible. The features are simplified. The shading is minimal.
The fur texture is suggested. The drawing looks like a character.
The key to cartoon drawing is style. You decide what to emphasize. You decide what to simplify.
The cat can be cute. It can be funny. It can be scary.
It depends on the style.
The Differences in Approach
| Aspect | Realistic | Cartoon |
|---|---|---|
| Reference | Required | Optional |
| Proportions | Exact | Flexible |
| Features | Detailed | Simplified |
| Shading | Complex | Minimal |
| Fur texture | Detailed | Suggested |
| Time | 45-90 minutes | 10-20 minutes |
Which Style Should You Learn First
Start with realistic. It teaches you the structure. It teaches you the proportions.
It teaches you to observe.
Once you understand the structure, you can simplify it. You can exaggerate it. You can change it.
That's the basis of cartoon drawing.
If you start with cartoon, you learn shortcuts. You learn to simplify. But you don't learn the structure.
Your drawings will look flat and generic.
Learn the rules first. Then break them. That's the path to good drawing.
The Universal Principles
Both styles share the same foundation. The eyes are in the middle of the head. The ears are on the sides.
The body is longer than you think. The tail is thick at the base.
The difference is in the details. Realistic drawing adds all the details. Cartoon drawing removes most of them.
But the foundation is the same.
How Long This Takes (Realistic Timelines)
Drawing is a skill. It takes time to develop. But the timeline is shorter than you think.
The First Drawing
Your first cat drawing will take about 15 minutes. It will look rough. The proportions will be off.
The features will be wrong. That's normal.
The first drawing is about learning the process. It's about getting comfortable with the steps. It's about understanding the structure.
The result doesn't matter.
The Ten Drawing Milestone
After ten drawings, something changes. The proportions start to look right. The features are in the right places.
The cat starts to look like a cat.
Each drawing takes about 20 minutes. The improvement is noticeable. The frustration decreases.
The enjoyment increases.
The Fifty Drawing Milestone
After fifty drawings, you have a system. The construction shapes are automatic. The feature placement is instinctive.
The shading is natural.
Each drawing takes about 15 minutes for a simple version. The basic cat drawing is no longer a challenge. You can draw a recognizable cat without a reference.
The One Hundred Drawing Milestone
After one hundred drawings, you're confident. You can draw a cat from any angle. You can add details.
You can change the style. You can draw without a reference.
Each drawing takes about 10 minutes for a simple version. The detailed version takes 30 minutes. The cat looks professional.
The Realistic Timeline
| Milestone | Time per Drawing | Quality Level |
|---|---|---|
| First drawing | 15 minutes | Rough |
| 10 drawings | 20 minutes | Recognizable |
| 50 drawings | 15 minutes | Consistent |
| 100 drawings | 10 minutes | Confident |
The Weekly Practice Schedule
Draw a cat every day for two weeks. That's 14 drawings. You'll see improvement by day seven.
You'll be surprised by day fourteen.
The key is consistency. A short drawing every day is better than a long drawing once a week. The practice builds muscle memory.
The repetition reinforces the structure.
When to Move to Harder Poses
After fifty drawings, try a different pose. A sitting cat. A sleeping cat.
A walking cat. The structure is the same. The proportions change slightly.
After one hundred drawings, try a different angle. The front view. The three-quarter view.
The perspective drawing. The structure is the same. The placement changes.
After two hundred drawings, try a different breed. A Siamese. A Persian.
A Maine Coon. The structure is the same. The details change.
Practice Routine That Actually Works
Most people practice wrong. They draw the same thing over and over. They don't focus on their weaknesses.
They don't track their progress.
Here's a practice routine that works.
The Warm-Up
Start with a warm-up. Draw five circles. Draw five ovals.
Draw five triangles. The shapes should be smooth and clean. This takes two minutes.
The warm-up prepares your hand. It loosens the muscles. It gets you in the rhythm.
It's like stretching before a run.
The Focus Session
Draw one cat. Take your time. Follow the steps.
Use a reference photo. Focus on one aspect of the drawing. The proportions.
The features. The shading.
The focus session is about quality. Not quantity. One good drawing is better than five rushed ones.
The goal is to improve, not to finish.
The Weakness Drill
Identify your weakness. Maybe it's the eyes. Maybe it's the ears.
Maybe it's the body proportions. Spend five minutes on that specific weakness.
Draw five eyes. Or five ears. Or five bodies.
Don't draw the whole cat. Just the part you're struggling with. The repetition helps.
The Speed Round
Set a timer for five minutes. Draw a cat as fast as you can. Don't worry about quality.
Just get the shapes down. The goal is to build speed.
The speed round is about instinct. You don't have time to think. You just draw.
This builds muscle memory. It makes the process automatic.
The Variation Drill
Draw the same cat from three different angles. The side view. The front view.
The three-quarter view. This takes about 15 minutes.
The variation drill teaches you to adapt. The structure is the same, but the placement changes. You learn to see the cat from different perspectives.
The Reference Study
Take a reference photo. Study it for two minutes. Notice the proportions.
The features. The shading. Then put the photo away.
Draw the cat from memory.
The reference study tests your observation. It shows you what you remember. It shows you what you missed.
Compare your drawing to the photo. Note the differences. Try again.
The Weekly Schedule
| Day | Practice |
|---|---|
| Monday | Warm-up, focus session |
| Tuesday | Warm-up, weakness drill |
| Wednesday | Warm-up, speed round |
| Thursday | Warm-up, focus session |
| Friday | Warm-up, variation drill |
| Saturday | Warm-up, reference study |
| Sunday | Rest or free draw |
The One Rule of Practice
Practice what you can't do. Not what you can do. If you're good at drawing eyes, don't practice eyes.
Practice the parts you're bad at. That's where the improvement happens.
Most people practice what they're comfortable with. They avoid the hard parts. That's why they don't improve.
Do the hard parts. That's the only way to get better.
When to Use a Reference Photo (And How to Read It)
Reference photos are not cheating. They're the standard tool for every professional artist. You can't draw what you can't see.
A reference photo lets you see.
When You Should Always Use a Reference
Any time you draw a new pose or a new angle, use a photo. Your memory is not reliable. You'll guess wrong.
The proportions will be off. The features will be in the wrong place.
Use a reference for the first fifty drawings. After that, you can try drawing from memory. But keep the photo nearby.
You'll need to check your work.
Use a reference for any breed you haven't drawn before. A Siamese cat has different proportions than a Persian. A Maine Coon has different features than a Sphynx.
The photo shows you the differences.
How to Choose a Good Reference Photo
The photo should be clear and well-lit. The cat should be in a simple pose. The side profile is best for beginners.
The front view is next. The three-quarter view is the hardest.
The photo should be high resolution. You need to see the details. The eyes.
The nose. The whiskers. The fur texture.
A blurry photo is useless.
The photo should show the whole cat. Not just the head. Not just the body.
You need to see the proportions. The head to body ratio. The leg length.
The tail length.
The photo should be taken at eye level with the cat. Not from above. Not from below.
Eye level gives you the most accurate proportions.
Where to Find Reference Photos
Your own cat is the best reference. You can take photos from any angle. You can control the lighting.
You can get the exact pose you want.
Free stock photo sites have thousands of cat photos. Search for "cat side profile" or "cat sitting pose." The selection is huge. The quality is good.
Avoid photos that are heavily edited or filtered. They distort the proportions. The colors are wrong.
The features are altered. You want a natural photo.
How to Read a Reference Photo
This is the skill that separates good artists from average ones. You don't copy the photo. You translate it.
You look at the 3D shapes and turn them into 2D lines.
Start by identifying the basic shapes. The head is a circle. The body is an oval.
The ears are triangles. The legs are cylinders. The tail is a curved tube.
Notice the proportions. How big is the head compared to the body? How far apart are the eyes?
How tall are the ears? The photo answers these questions.
Notice the shadows. Where is the light coming from? Which parts of the cat are in shadow?
The shadows tell you where to shade.
The Grid Method
The grid method is a tool for transferring a photo to paper. You draw a grid over the photo. You draw the same grid on your paper.
You copy the photo square by square.
The grid method is useful for complex poses. It ensures the proportions are accurate. It removes the guesswork.
It's a learning tool, not a crutch.
Once you're comfortable with the grid method, try drawing without it. The grid teaches you to see proportions. Eventually, you don't need it.
The Comparison Method
The comparison method is more advanced. You look at the photo. You look at your drawing.
You compare the two. You adjust your drawing.
This method requires you to see the differences. The eyes are too high. The ears are too small.
The body is too short. You notice the errors. You fix them.
The comparison method is faster than the grid method. It's also harder. It requires practice.
But it's the skill you need to draw without a reference.
When to Stop Using a Reference
You don't stop using references. Professional artists use them every day. The goal is not to draw without a reference.
The goal is to draw better with a reference.
The reference is a tool. It's not a crutch. It's a source of information.
You use it to learn. You use it to improve. You use it to check your work.
The best artists use references for every drawing. They use multiple references. They combine them.
They adapt them. The reference is the starting point, not the ending point.
Frequently Asked Questions
How long does it take to learn to draw a cat?
Most beginners can draw a recognizable cat after about 10 to 15 practice sessions. Each session takes about 20 minutes. That's about 3 to 5 hours total.
By 50 drawings, you'll be confident and consistent. The key is daily practice, not long sessions.
What is the easiest cat pose for a beginner?
The side profile is the easiest. The proportions are straightforward. The features are easy to place.
The body is visible. The legs are simple. The front view is harder because the body is hidden.
The three-quarter view is the hardest. Start with the side view.
Do I need to use a reference photo?
Yes, for the first 50 drawings at least. The reference photo shows you the correct proportions. Your memory is not reliable.
You will guess wrong. The photo keeps you honest. After 50 drawings, you can try from memory.
But keep the photo nearby.
Why does my cat drawing look like a dog?
The ears are usually the problem. Cat ears are tall and point outward. Dog ears are shorter and flop down or point forward.
The face shape is also different. Cat faces are rounder. Dog faces are longer.
Check the ear placement and the face shape.
What pencil should I use for drawing cats?
Use an HB or 2B pencil for the main drawing. HB is good for light construction lines. 2B is good for the final lines and shading. A 4B is useful for dark shadows.
A set of three pencils covers everything. You don't need more than that.
How do I draw cat fur that looks real?
Use short, tapered strokes. Each stroke starts with pressure and ends with a light lift. The direction of the strokes should follow the natural growth pattern of the fur.
Focus on the edges of the cat. The interior can be smoother. Less is more with fur texture.
Should I draw the eyes first or last?
Draw the eyes after the basic shapes but before the details. The eyes are part of the feature placement step. They should be drawn after the head circle and the center guidelines.
The eyes determine the placement of the other features. Get them right first.
How do I fix a drawing that looks wrong?
Identify the specific problem. The eyes are too high. The ears are too small.
The body is too short. Then fix that one problem. Don't redraw the whole thing.
Use the kneaded eraser to lift the lines. Adjust the proportions. The fix is usually a small adjustment.
Can I draw a cat without any art experience?
Yes. Drawing is a skill, not a talent. Anyone can learn.
The steps are simple. The process is repeatable. The improvement is measurable.
The first drawing will be rough. The tenth will be better. The hundredth will be good.
The experience level doesn't matter.
What is the most common mistake beginners make?
Starting with the details. Beginners draw the eyes first. They spend 15 minutes on perfect eyes.
Then the body doesn't fit. The proportions are wrong. The whole drawing falls apart.
The fix is to start with the basic shapes. Spend 80 percent of your time on the foundation. The details come last.